DIY built-in furniture from cad to cam
Many customers use SketchUp and we can interpret the drawings into our system
Our customers are savvy people and we regularly get designs drawn up in a variety of software packages. Often this is Autocad or Sketch-Up but we also get sent drawings made in Microsoft Word and Powerpoint.
If your day job involves regular use of these software packages then why not use them to think out your furniture ideas? Although of course we believe our online design tools are far superior to Powerpoint for designing fitted furniture!
If you would like to send us your Autocad/Sketch-Up/Word etc drawings then we request that you export the drawing as a PDF document from these packages. This side-steps the difficulties working with different software package version numbers.
When we receive your design we will then interpret it onto our own design tools. The reason we do this is that Autocad, for example, is CAD (Computer Aided Design) and what we do is CAM (Computer Aided Manufacture).
CAD involves drawing a cabinet shape in the needed dimensions whereas CAM involves taking all the panels for that cabinet and generating a cutting list as well as a drilling plan for all the dowels, screws, shelf pins, skirting board notches, angles etc. In the side panel shown later there are over 50 holes/routing paths that the CAM process determines the positions for. And many of these holes must line up across panels so that for example the dowels that join the cabinet sides to the top are in the right place. For the whole job there will be hundreds of holes needed – information that the Sketchup drawing simply does not contain. One of the unique features of the Fortschritt Bespoke Cabinetry service is that we can generate all this information mostly automatically which means that we can offer one off bespoke pieces in a scaleable and therefore affordable way.
We generate the CAM files which are then sent electronically to the production machinery.
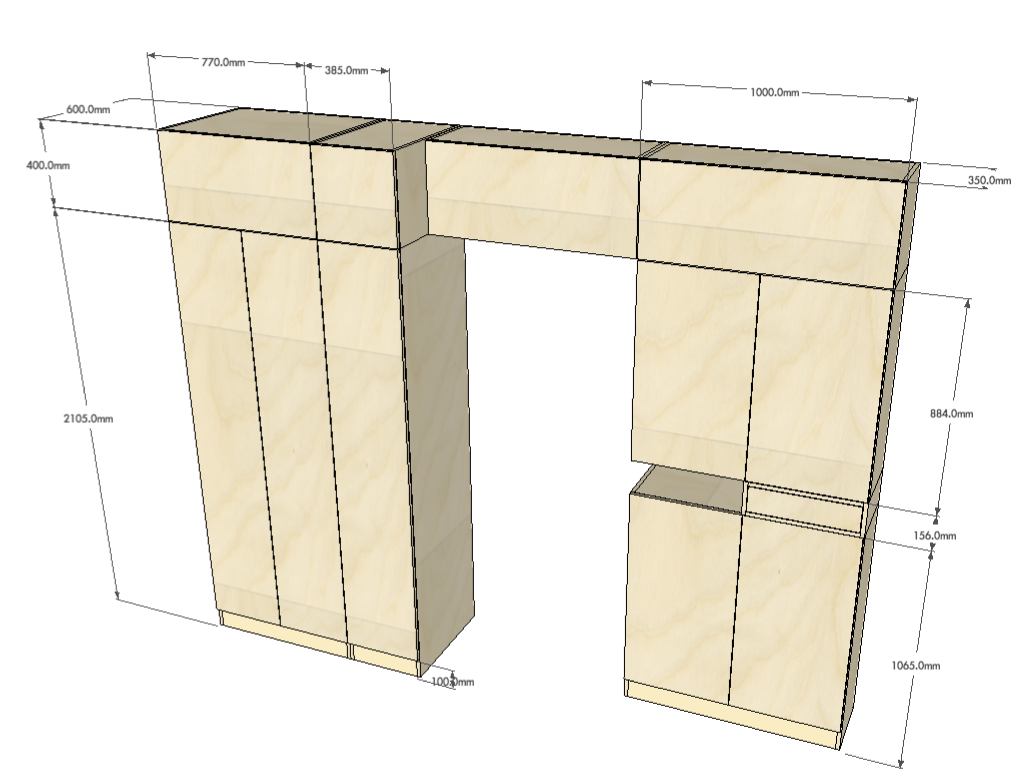
Below is a Sketch Up drawing sent in by a customer and we’ll show the whole process through to finished installation.

Customer storage project created in SketchUp
We then interpreted this design into our Cabinet Designer tool and here is the result:

Customer storage project interpreted into Fortschritt Bespoke Cabinetry
We’ve been able to interpret the design faithfully. This involved splitting the design into separate cabinets created with our ‘Cabinet Designer‘ then on the order page there is a ‘Cabinet Combiner’ facility where we dragged the cabinets into position and took this screenshot.
Now let’s look at the detail produced by our CAM system.
Here’s the right hand side panel for one of the tall cabinets:
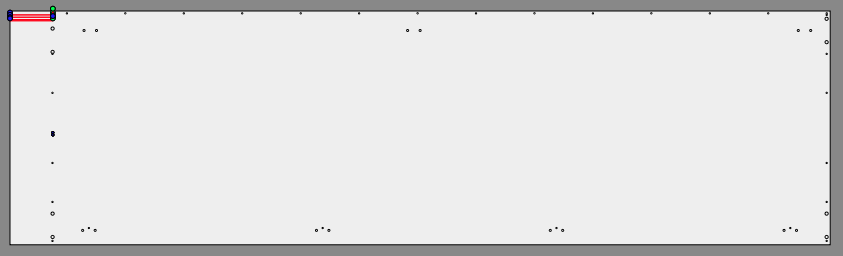
Cabinet side drilling plan report from our bespoke CNC machining software
This diagram was produced by one of our applications behind the scenes at Fortschritt Bespoke Cabinetry and shows the machining positions for dowels, hinge plates, pilot holes and the notch for the skirting board. We’re showing this here for completeness but note that customers don’t need to get into this level of detail – well unless you really want to see it!
This CAM information can be edited – e.g. adding cable cutouts is a popular request. All our applications are web-based so on occasion we have given access to customers who want to do something particular or special and they have edited the drilling/routing patterns themselves. Most of the time though just Fortschritt Bespoke Cabinetry staff work with this information.
Here is the corresponding door for the cabinet showing the hinge drilling pattern:
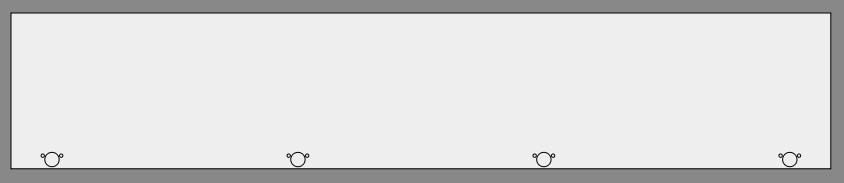
Door drilling plan report from our bespoke CNC machining software
And here is a photo montage of the design after installation:
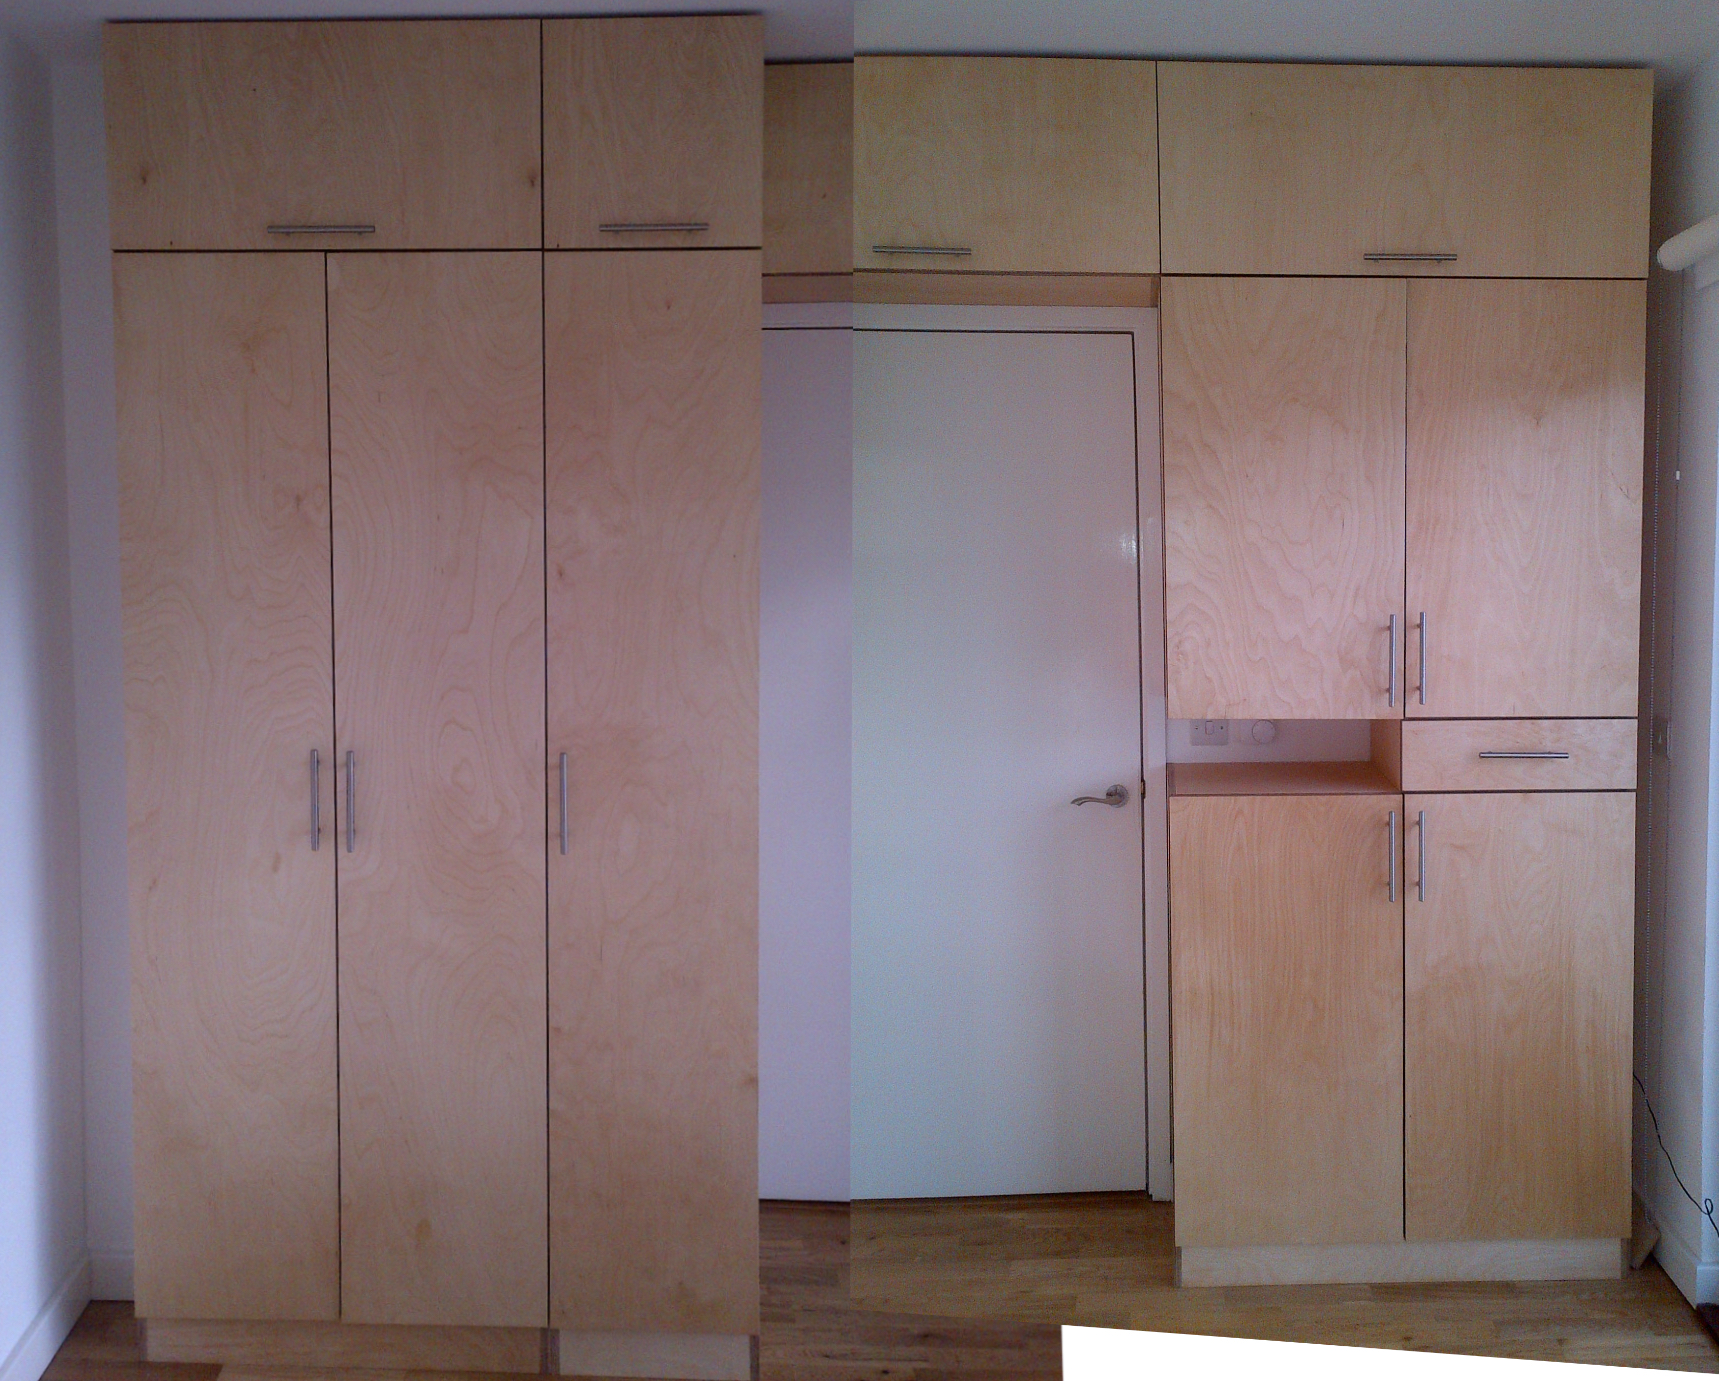
Photo montage of customer designed cabinetry
Summary
We wanted to share with you a process – working with a CAD drawing produced by the customer – we’ve engaged in many times and if this way of working suits you then go for it.
However if you are starting with a blank sheet of paper then we recommend that you use our online design tools in preference to a conventional CAD package. Our online design tools are CAD in that they have these characteristics: – Parametric. A cabinet has two sides, a top and a bottom. You might start with a cabinet 900mm high and then decide later you want it 1000mm high. Like a good CAD package everything will be stretched and moved accordingly without needing to individually manipulate each component. The position of shelves can be calculated to be spaced evenly automatically. – The design can be saved and iterated. Some customers work on a design for hours/days/weeks. You always want to be able to save what you’ve done and then come back and edit it. – Design options evaluated quickly. With the Cabinet Designer whether a cabinet has one door or two can be decided with a single mouse click.
Where DIY Wardrobes offers a considerable advantage is that you get cost information as you are designing. As you change sizes, materials, add drawers and shelves etc the cost for the design is calculated automatically.